
Your bike has been hauling you up climbs, down chutes, and through every questionable line choice you’ve made. The least you can do is give it a basic bike tune up once in a while. Most riders put this off until something stops working mid-ride, which is technically one way to learn about bike maintenance, though not the most fun. Whether you’re a weekend ripper or someone who considers the trail their second office, this checklist covers what a proper tune involves, what you can handle at home, and when it’s worth letting a professional take the wheel.
What Is a Basic Bike Tune Up (and Why Should You Care)?
A basic bike tune up is a full inspection and adjustment of your bike’s core systems: brakes, drivetrain, wheels, and bearings. Think of it as a reset button for a machine that’s been through a lot. Things drift out of spec gradually, cables stretch, components wear, and your bike slowly starts feeling a little “off” in ways you keep meaning to look into.
Denver riding is not gentle. High-altitude trails, relentless Front Range grit, and terrain that is genuinely excellent but also genuinely punishing means your components are earning their keep on every single ride. Staying on top of a solid bicycle tune up checklist is the difference between catching small issues early and getting surprised by them at the worst possible time.
Signs Your Bike Is Begging for Some Attention
You don’t always need a calendar reminder. Your bike communicates, and once you know what to listen for, it’s pretty hard to ignore the signs. Be sure to note when:
- Shifting feels sluggish or starts skipping gears under load
- Brakes are spongy, screechy, or just not inspiring much confidence on the way down
- Wheels wobble when you spin them
- Your chain sounds like it’s in pain while pedaling
- Bearings feel gritty when you spin the cranks or turn the bars
If any of those hit close to home, read on.
Your Bicycle Tune Up Checklist: Everything That Gets Checked
Here’s the full rundown of what goes into a thorough basic bike tune, working from the cockpit back to the rear axle. Some of this you can knock out at home. Some of it is better left to your friendly neighborhood bike mechanic who does this every day and has the right equipment.
1. Brakes
Good brakes are a lifeline, especially if your rides involve descents worth bragging about.
Check Brake Pad Wear and Alignment
Worn pads lose stopping power gradually, which is how people end up white-knuckling it down a hill wondering when this started happening. Check the pad surface and if the material looks thin or you can see the metal backing, replace them. They should also sit flush and parallel to the rotor or rim, not hanging at an angle like they gave up.
Adjust Cable Tension and Lever Feel
Cables stretch with use, which is how firm, snappy levers slowly become something that feels like squeezing a very unimpressive stress toy. Dial in the barrel adjuster at the lever or caliper until you’ve got solid, responsive feel with just two fingers.
Deglaze Rotors and Pads
Glazed rotors might sound delicious, but they can be sneaky. Your brakes still technically function, but they squeal, grab inconsistently, and generally behave in ways that erode your confidence. Lightly scuffing the pad surface and wiping down the rotor with isopropyl alcohol usually fixes the whole thing surprisingly fast.
2. Drivetrain
A well-maintained drivetrain is the difference between a bike that feels effortless and one that feels like it’s working against you.
Lube and Inspect the Chain
A dry or stretched chain is one of the fastest ways to destroy an otherwise perfectly healthy drivetrain. Use a chain checker tool to measure wear before assuming it’s fine. If it’s still in spec, clean it with a degreaser, let it dry completely, and re-lube for your conditions. Use dry lube for dusty Colorado days or wet lube for the rare occasion it actually rains.
Tune the Derailleurs
Ghost-shifting mid-climb is the kind of experience that really puts your vocabulary to the test. Both derailleurs should move the chain cleanly across every gear without drama. Most of the fix comes down to small barrel adjuster tweaks, but the difference between a perfectly tuned drivetrain and a mediocre one is something you feel on every single pedal stroke.
Inspect Cassette and Chainring Teeth
Shark-fin shaped teeth are the universe telling you it’s time. Pairing a worn cassette with a new chain, or a fresh chain on a beat-up cassette, leads to skipping under load. Nobody wants that kind of surprise when they’re already suffering on a climb.
3. Wheels and Tires
Check Tire Pressure and Condition
Correct pressure depends on rider weight, tire volume, and terrain, so there’s no universal answer. Running tubeless (and honestly, if you’re not, now’s a great time to reconsider), your sealant needs a refresh every four to six months, and more often in Colorado’s famously dry air. Check sidewalls for cracking and pull out any embedded debris before it turns your ride into a walk.
Spin each wheel and watch how it tracks. Side-to-side wobble means it needs to be trued. Minor stuff is totally doable at home with a spoke wrench if you have the patience for it. Anything more significant really does belong on a proper truing stand, not the “close enough” method.
True Your Wheels
Your wheels take a beating on every ride, and a little attention here goes a long way toward keeping things rolling smoothly.
4. Bearings and Headset
Check the Bottom Bracket and Hubs
Wiggle the cranks side to side. Any movement means something’s loose or worn. Spin the rear wheel and listen for grinding, which is the hub bearings’ polite way of asking for a tune.
Squeeze the front brake, stand over the bike, and rock it forward and back. Any clunking or play in the headset means it needs adjustment or new bearings. A loose headset affects steering in subtle, annoying ways and quietly stresses your frame with every ride.
Inspect the Headset
Bearings and headset issues are easy to miss until they’re impossible to ignore. Here’s what to check.
5. Cables, Housing, and Controls
The unglamorous stuff that quietly runs the whole show.
Lube and Inspect Cables
Cables and housing soak up weather and trail grit over an entire season, and it shows. Cracked housing is basically an open door for moisture, which corrodes cables and turns shifting into a frustrating guessing game. If your adjustments are dialed but things still feel stiff, the housing is your prime suspect.
Check Bar, Stem, and Seatpost Bolts
A quick sweep with a torque wrench or hex key across all your contact points. Everything should be at spec. A loose stem or seatpost is genuinely not a “deal with it later” situation, even if it feels like one in the moment.
What a Pro Tune Adds That DIY Doesn't
Wrenching on your own bike is a great skill and there’s nothing wrong with it! Knowing your machine from the inside out makes you a better rider. But home maintenance and a professional tune are two different things, and if you’ve ever ridden a bike that just came out of a full shop service, you already know that.
A good mechanic can catch things in a wheel that a stand-and-squint inspection won’t find. They know what a bottom bracket sounds like when it has three rides left in it. That kind of feel only comes from working on hundreds of bikes, and it’s the part you can’t replicate with a YouTube tutorial and a hex set, no matter how good that hex set is.
Here’s what a professional basic bike tune actually gets you that the garage session doesn’t:
- Solvent tank cleaning that pulls embedded grit out of every link in your drivetrain, the kind of deep clean a rag and a bottle of degreaser will never fully reach no matter how long you spend on it
- Bearing adjustment to actual torque specs, not the “feels tight enough” method that quietly becomes a problem a few rides from now
- Cable housing inspection under real load, because cracks and corrosion hide in places a visual check won’t catch until your brakes start acting up on a descent
- Full wheel true on a proper truing stand, dialed with the kind of precision that makes your wheels feel like new and stay that way
- Experienced eyes on your wear patterns so the cassette that’s close to done, the brake pad that looks fine but isn’t, and the derailleur hanger that’s just slightly off all get caught before they turn into a bad day on the trail
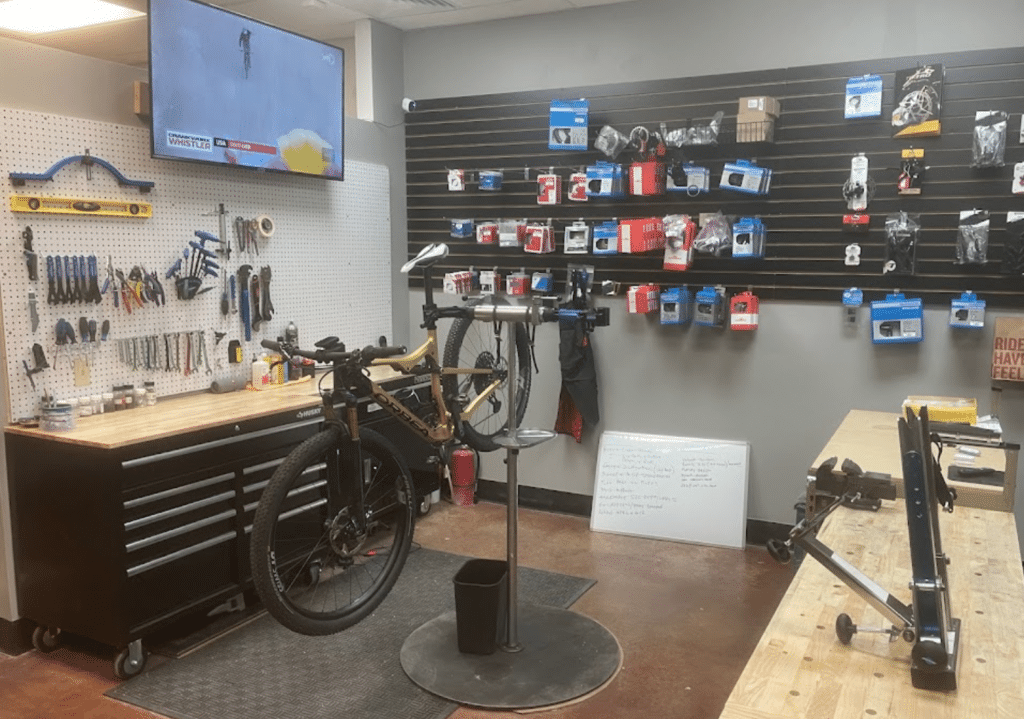
At Base Camp Cyclery, a basic tune covers derailleur and brake adjustment, wheel truing, pad and rotor deglazing, cable lube, bearing adjustment, chain lubrication, and a full clean. The mechanics at our Denver mountain bike shop have 40-plus combined years of wrenching experience. They’ve seen every way a bike can slowly fall apart, and they know exactly what to look for before it becomes your problem mid-ride.
How Often Should You Actually Get a Tune Up?
Here’s a schedule that makes sense for most riders:
- Once a year for casual or fair-weather riders
- Every 6 months if you’re riding regularly through all seasons
- Every 3 to 4 months if you’re logging serious miles or racing
Colorado’s high UV, dry air, and abrasive trail conditions wear on cables, sealant, and drivetrain lube faster than most riders expect. The more you ride, the more frequent your bike’s service intervals should be.
Get Your Bike Trail-Ready at Base Camp
If you’ve gone through this bicycle tune up checklist and something still feels off, or you’d just rather have someone with experience handle it while you plan your next ride, come see us. Schedule service with us here or give us a call at 720-612-4962!